Verschiedenes - Oder: Alles
Mittwoch, 29. November 2017
Donnerstag, 2. November 2017
Just another weatherstation with an ESP8266
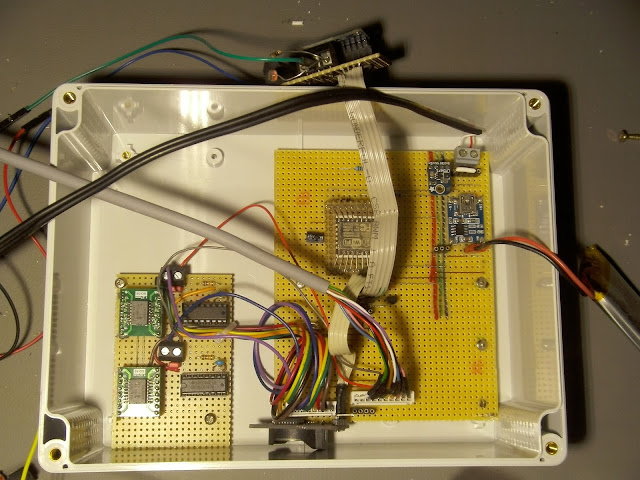
What i want to show is my idea of a weatherstation. It includes the following sensors:
- BMP280 (Humidity, Temperature, Pressure)
- RTC
- LDR
- Moisture/ Rain
- Winddirection
- Windspeed
The ESP reads out all the sensors. He is possible to send the data to a tingspeak account, and additional to my personal webserver via a GET - command. So in the future i will be able to evaluate the data (Is it raining? How bright is it? Cloudy or Night?) and to take some further (and maybe very inaccurate) steps into weather forcasts.
The Battery has a capacity of 1500mAh at 3,7V. The Solar-Panels have a Pmax of 5,5Wa at Vpmax of 18V and Ipmax of 0,3A.
Der ESP wird via deepSleep in den Tiefschlaf versetzt und wacht alle 20 min auf, um Messwerte einzuholen. Ein NPN Transistor dient dazu, dann auch die anderen Busteilnehmer (BMP280, 2x PCF für Regen und Wind 2x ADC und die RTC) zu aktivieren. Die RTC wird genutzt, um die Windgeschwindigkeit zu errechnen. Die Zeit wird zu Startbeginn des ESP abgefragt, und über die Laufzeit des ESP und die gezählten Umdrehungen des Anemometers wird die Windgeschwindigkeit berechnet. Der AtMega ist nicht mehr Bestandteil der Wetterstation, da dieser zum "Schlafen-legen" des ESP gedacht war, sich mit dem deepSleep-Modus allerdings genug Energie einsparen lässt.
Dienstag, 3. Oktober 2017
Winter is coming - Back to Indoor Gardening
The days become shorter, the temperatures colder. The fruits in the garden are mostly harvested, plants stop growing. It's time to bring them into the house. I red a lot about indoor Gardening in the last year, and this winter I want to try it very seriously. This is how I started:
- 26.08.2017: I took a tomato plant into my room.
The room has an averange temperature of about 20°C, the window near which the plant grows is on the western side of the house, so the sun shines on the plant from about 14 o'clock till sunset.
- Until today (03.10.2017), the plant grew about 1m, expanded some blossoms. Three became tomatos around 5th September, which grew a bit till today. The leaves on the top of the plants became very weak, I think it is because they grow above the window, so they can't reach sunlight anytime of the day.
- 03.10.2017: I set up an Arduino Nano with a RTC, a relay and two LEDs (CREE XLamp MX-6, 4000K, 3V, 300mA). The LEDs will shine on the plant when a defined light level is reached for about 2 hours, so that the plant - especially the leaves on top of the plant have a bit more light per day.
This system is powered by 4x 5V; 2,5W Solar Cell, which feed the electrical energy into three 18650 rechargeable batterys.
I will test this setup this week and sum it up afterwards. If I reach a positive conclusion, I really want to improve the setup by more plants and LEDs.


- 04.10.2017: I added two lettuce plants and two tomato plants that should grow up. I light them with two CREE MX-6 and two cold white (9300K, 3,3V, 20mA, 36000mcd) LEDs. The lights are controlled by a easy circuit using a comparator (LM358) and a light dependent resistor.
- 26.08.2017: I took a tomato plant into my room.
The room has an averange temperature of about 20°C, the window near which the plant grows is on the western side of the house, so the sun shines on the plant from about 14 o'clock till sunset.
- Until today (03.10.2017), the plant grew about 1m, expanded some blossoms. Three became tomatos around 5th September, which grew a bit till today. The leaves on the top of the plants became very weak, I think it is because they grow above the window, so they can't reach sunlight anytime of the day.
- 03.10.2017: I set up an Arduino Nano with a RTC, a relay and two LEDs (CREE XLamp MX-6, 4000K, 3V, 300mA). The LEDs will shine on the plant when a defined light level is reached for about 2 hours, so that the plant - especially the leaves on top of the plant have a bit more light per day.
This system is powered by 4x 5V; 2,5W Solar Cell, which feed the electrical energy into three 18650 rechargeable batterys.
I will test this setup this week and sum it up afterwards. If I reach a positive conclusion, I really want to improve the setup by more plants and LEDs.


- 04.10.2017: I added two lettuce plants and two tomato plants that should grow up. I light them with two CREE MX-6 and two cold white (9300K, 3,3V, 20mA, 36000mcd) LEDs. The lights are controlled by a easy circuit using a comparator (LM358) and a light dependent resistor.
Samstag, 9. September 2017
Just some things about the Adafruit TPL5110
 |
| That's it how the TPL5110 is now in use |
In order to build a wheatherstation, to have a better overview over the temperatures in winter, I bought the TPL5110 from Adafruit. This should allow me to shut down the whole system, which includes a RTC, a ADS1115 with analog sensors (winddirection, moisture and illumination), and a DHT11, if there are no measurements token.
The first thing I had a problem with were the peaks every I/O Pin of the ESP puts out when it is turned on. This peak was able to activate the TPL, which shuted down the ESP. So the ESP wasn't able to work. First I tried to use a capacitor. It worked very well, to prevent the TPL from the peaks, but its long discharge time caused that the time of the TPL wasn't set correctly, and every wakeup time was different from the others.
So I tried to put a diode from the "Done" pin to ground which helped a bit to stabilize the times of the TPL. But I still had problems to start the IC. Sometimes, it won't start, and sometimes, it won't wokr after the first measurement. I figured out that there were not such problems if I hold the VDD and GND pin to GND of my power supply. So I thought there must be some problems caused by capacitance. Now, I desoldered the capacitor of the TPL5110 breakout-board - and it still works quiet well!
To bypass Boot-Mode-Errors of the ESP8266 (which are often caused by an unstable power supply) I added a 10 mikrofarad capacitor between the "DRV" pin of the TPL and ground.
So for short, what I did:
- desolder 1µF capacitor from TPL5110 beakout
- add a 1N4001 diode from Drive to ground
- add a 10µF capacitor from DRV to ground
Excuse me please for my english spelling and thanks to exp-tech who provide electronics from Adafruit in Germany!
Samstag, 12. August 2017
Printer to CNC: Update 4
I quit. The Construction, made of plastic pieces from the printer and also the construction of the Z-Axis are to weak. In addition, i wasn`t able to calibrate the X-Axis. I will stop this Project, get some new stuff - or a 3D-Printer first - and will/ want to build a new machine. As a role model, i want to use homofaciens "CNC v2.0".
Donnerstag, 16. Februar 2017
Printer to CNC: Update 3
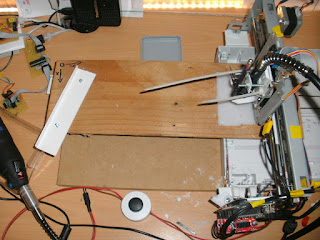
Hooked up a Dremel with a flexible shaft to the machine. I switched from zapmaker's grblControl to Candle. It took a lot of time toconfigure GRBL for the different motors, but it works now very well. The main problem is the stability of the mechanics and the force of the dremel in context with the hardness of the material - something I have to fix in the future.
Donnerstag, 3. November 2016
ESP8266: LED-Matrix Control by Webinterface: Update 2
I just found out, that somebody came up with this idea a bit earlier. I stop the project for now, because this solution is a lot better than I could do it anytime.
Abonnieren
Kommentare (Atom)


